Where do we go from here?
This post continues the ‘From Chaos to Source of Truth’ series, picking up where Part 1 left off.
Every new initiative, and every green light on a Proof of Concept, starts with the same question: what is the right approach? And as tech enthusiasts, the temptation is always the same as well. Install everything, enable every feature, and fidget around until it starts to make sense.
I am all for being curious. But when it comes to understanding what a Source of Truth is, and the tooling that surrounds it, you get a lot further by starting small and staying guided.
So, what do we need to get ready sailing?

The shopping list
Let’s start with a shopping list of what you need to do to get started with a Source of Truth:
- A server (preferably a VM or a container) to host your Source of Truth database.
- Access to an SoT Tool, for the guide we will use Nautobot.
- From that server, routable access to the network devices that are in scope.
- Credentials (usernames, passwords, API tokens, etc.) to access the network devices.
- Firewall rules that allow the Source of Truth server to reach the network devices.
- A named contact in the team that owns the firewall rules and the credentials, because you will be going back to them more than once.
Notice that most of this list is not about the tool. Four of the six items are access: routing, credentials, firewall rules, and the person who grants them. In practice this is where the time goes, and it is worth knowing that up front so you can request all of it in one go instead of discovering each blocker one at a time.
Warning I would highly recommend to not use your production network to test this, but first use a lab environment or a small subset of your network that is not critical. In theory we are only reading devices, but you still need to be careful and make sure you are not changing your devices instead of reading them.
Nautobot Apps for the shopping list
I would recommend adding these Nautobot apps to your shopping list, as they are used throughout this series:
- Device Onboarding App: This app allows you to onboard devices into Nautobot. It supports multiple vendors and can be used to automate the onboarding process. (We will cover this in the next part of this series)
- Welcome Wizard App: This app allows you to quickly set up your Nautobot instance.
- Nornir App: This app is an automation/orchestration framework that uses packages such as NAPALM, Netmiko, and others to connect to network devices. It can be used to automate tasks such as configuration management, data collection, and more.

Waiting for the perfect environment
In many larger organizations, asking for a test server, a Nautobot installation, network access from that server to your devices, credentials, and firewall rules can take a long time.
Most people treat that wait as dead time. It does not have to be. While the tickets are open, build a rehearsal environment: a small stand-in for what you are waiting on, in your own lab or a cloud account. It is where you get familiar, and where you find the flaws in your shopping list while there is still time to add them to the ticket.
The rehearsal does not need to look like your network. It needs to answer the questions you would otherwise only be able to ask after the change window: does the onboarding app reach a device through a jump host, does it recognise your platform, does the credential model you asked for actually cover all your vendors.
Earlier in my career I inherited a Palo Alto and CheckPoint estate, and every change was slow because every change was live. So I built a GNS3 lab with a handful of both. The lab was never the point. Being ready on day one, instead of starting to learn on day one, was the point. The same applies here: by the time the real server lands, you should already know what you are going to do with it.
Getting Nautobot running
This is the part everyone expects to be hard, and it is the part that matters least. You are not building a platform yet. You are building somewhere to put the data, so you can find out how wrong it is.
So pick the fastest route to a login screen:
- Container: Easy to get started with, scalable, and perfect for lab environments where you frequently destroy and recreate the environment.
- Full install on a VM: Easy to maintain and manage, and a good fit for more traditional environments.
The official Nautobot Installation Guide covers both.
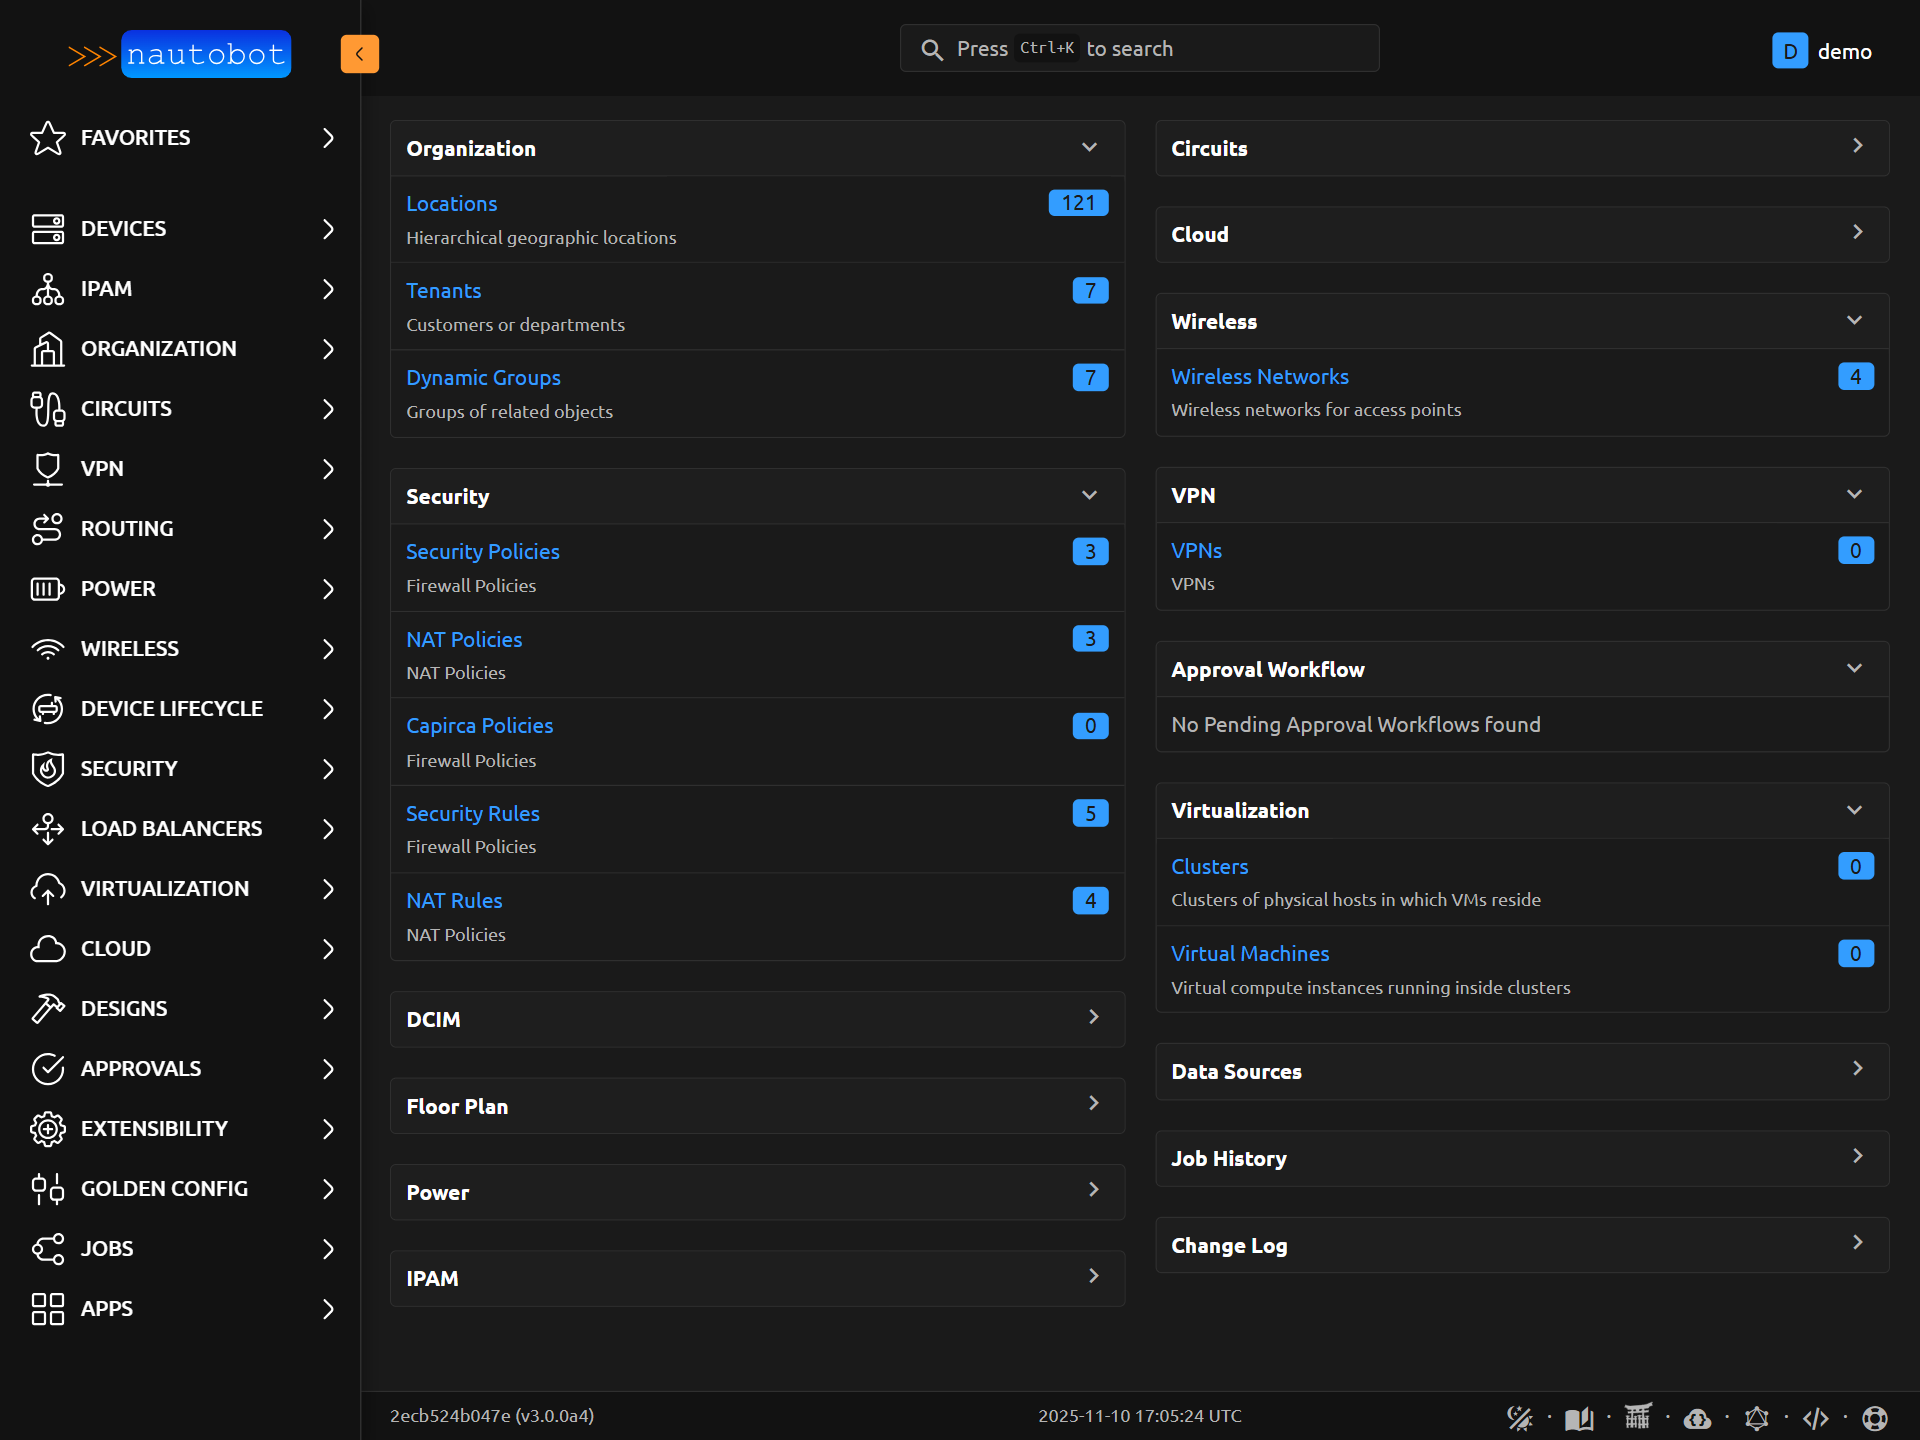
If you only want to get familiar with Nautobot first, use the public demo instance at demo.nautobot.com. It is read only, but it gives you a feel for the interface and the data model without installing anything.
And if you are up for the challenge, there is a 100 Days of Nautobot program that takes you from zero to a working instance in 100 days. It is a great way to get familiar with the tool and what it can do.
Once Nautobot itself is running, install the apps from the shopping list. Each one has its own installation guide:
Making Nautobot ready
Welcome to the Source of Truth
You log in for the first time and you get a lot of empty fields. That is normal, and it is worth resisting the urge to fill them all. The philosophy here is “less is more”: it makes no sense to have every vendor in the world defined in your instance, in the same way you do not enable every spanning tree variant on a switch when you only run one of them.
So what do we need to make Nautobot ready?
Devices in Nautobot cannot exist on their own. Each one hangs off a set of foundational models that have to exist first:
- Location: required for a device to be created at all (example: LAB-01, AMS01).
- Manufacturer: the vendors you actually own (example: Arista, Cisco, Juniper).
- Device type: the models sitting in your lab (example: Catalyst 9300, MX480, DCS-7050).
- Role: what the device does for you (example: core, distribution, access, firewall).
The Welcome Wizard App exists for exactly this moment: a fresh instance, nothing in it, and a handful of models that all depend on each other. It gives you one dashboard with all four on it, and it imports manufacturers and device types straight from the community DeviceType library, so you pick from a list instead of typing.
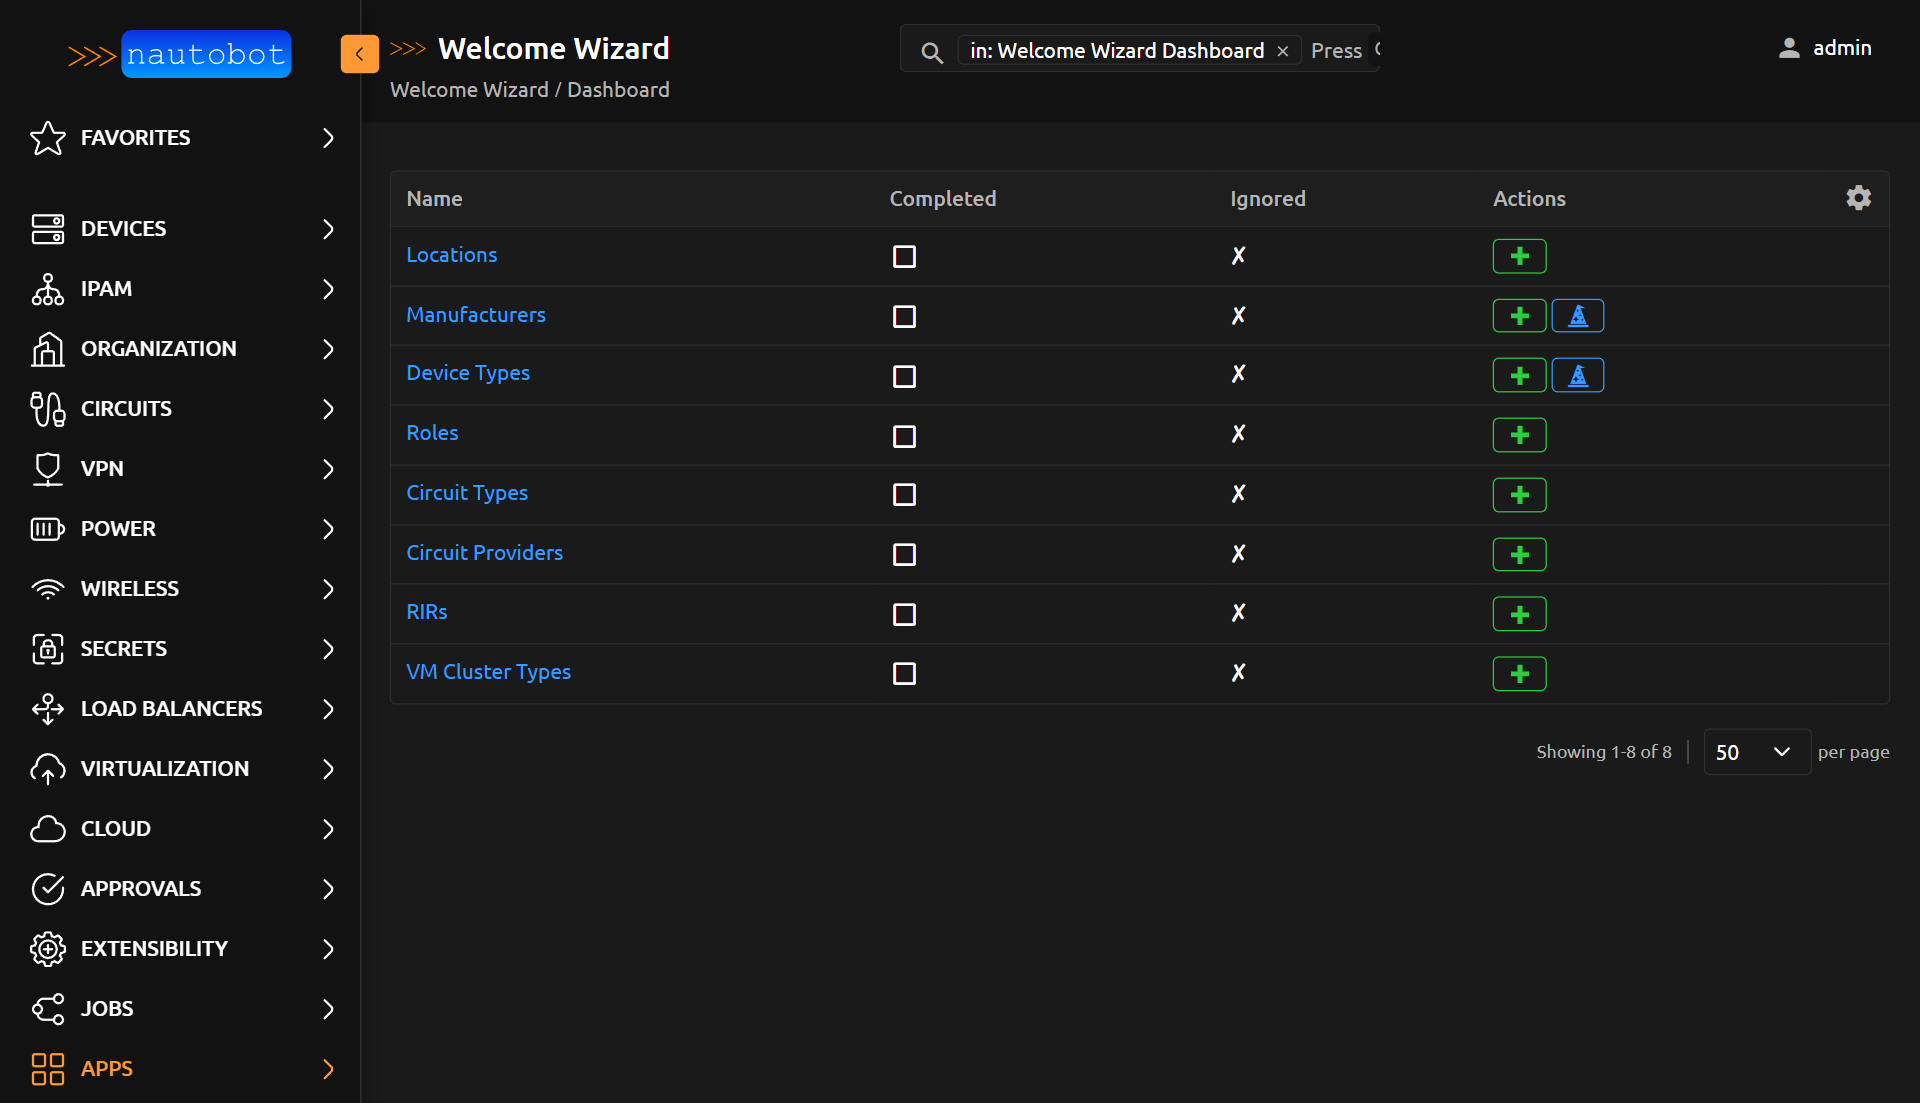
Reference: importing models with the Welcome Wizard
There is a fifth model you need, and the Wizard does not create it: the Platform. You add those by hand, and they are worth their own section, because that is where the connection details live.
Platform and Connection Drivers
I would recommend installing the Nornir App from the shopping list. Nautobot stores driver metadata, it does not dial out with it. Nornir is one way to turn that into a live session, not the only one (a Job can drive Netmiko or NAPALM from the same mappings), and it is the one the next part builds on.
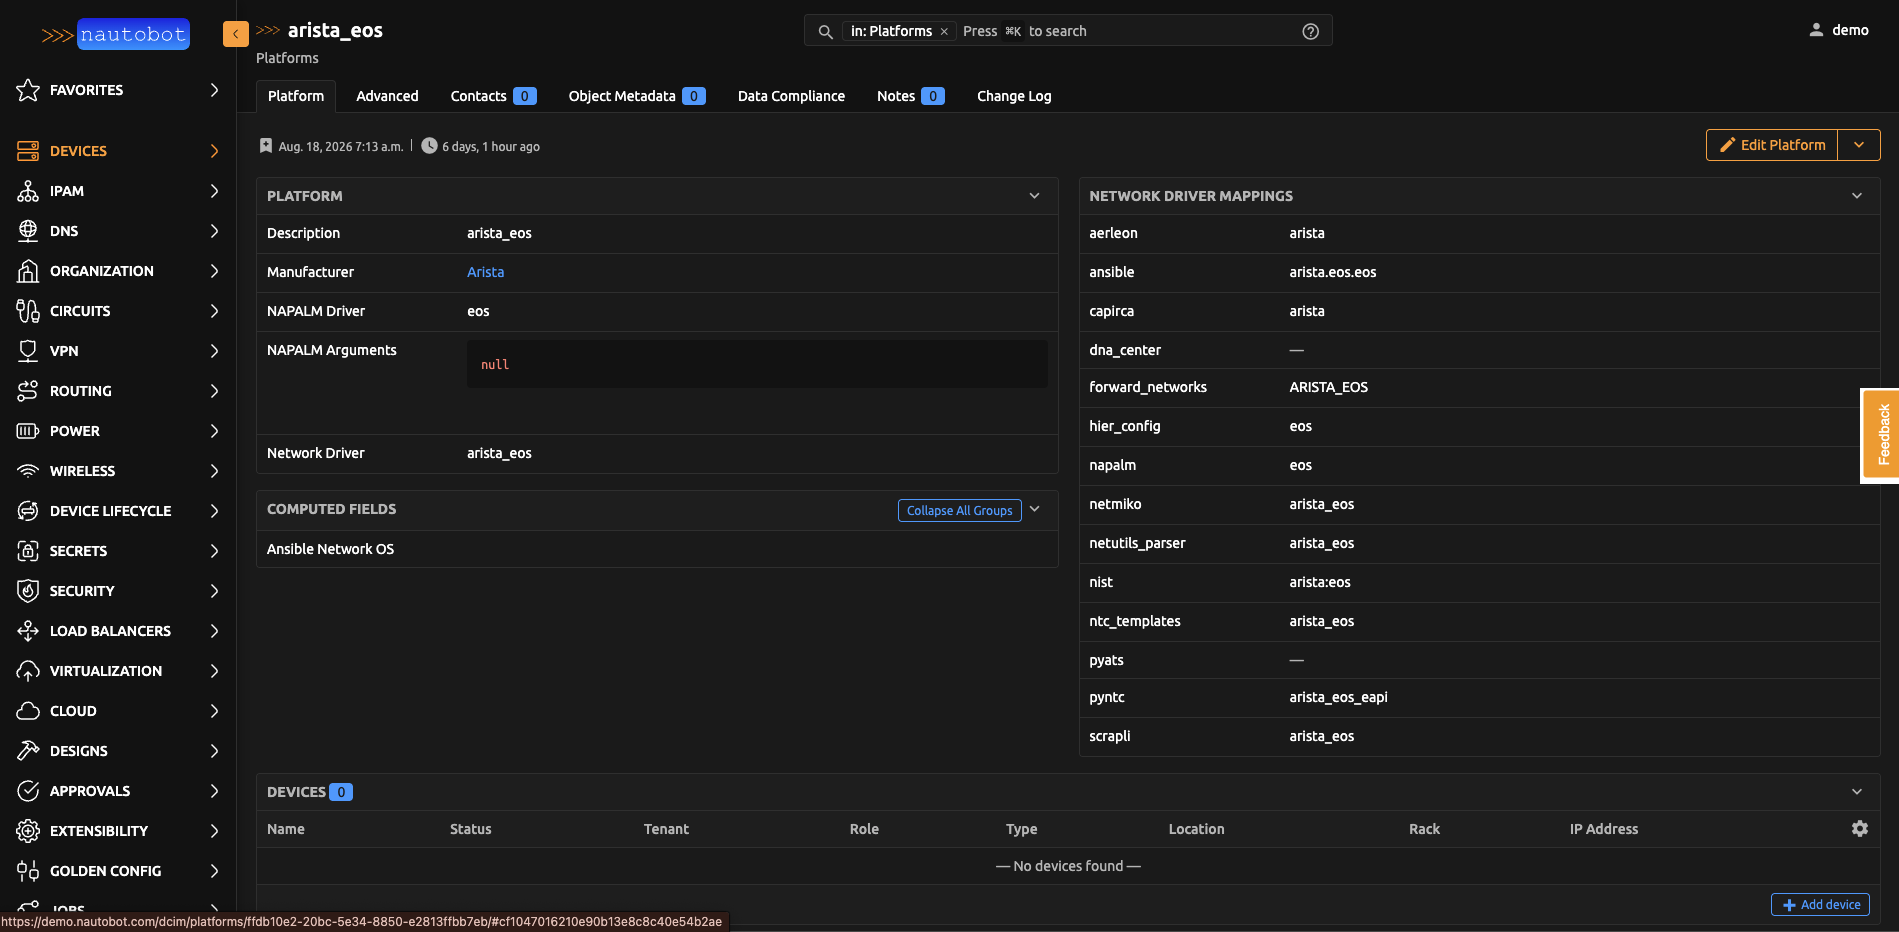
Here is the part people miss: the driver details are not on the device, they live on the Platform. A platform is the software family running on the box, and it carries the driver names the automation libraries need. Set it once per operating system, and every device you assign to it inherits it.
The platform answers how to speak to a box, not where it is or who you are. The address comes from the device, the credentials from a secret.
The field that earns its keep is the Network driver. One generic string such as arista_eos goes in, and netutils expands it into whatever each tool expects: eos for NAPALM, arista.eos.eos for Ansible, arista_eos_eapi for pyntc, and a dozen more under Network Driver Mappings. Show Configured Choices lists every value Nautobot accepts, and you can type one that is not in the list, but then you get no mapping unless NETWORK_DRIVERS is updated.
Two things that are not obvious from the form:
- Set the Manufacturer even though it is optional. It stops anyone assigning JunOS to a Catalyst.
- Fill in the NAPALM driver too. Nautobot’s built-in NAPALM integration reads that field directly, so the netutils mapping alone will not cover it.
What you should have
Before we start onboarding devices in the next part, walk through this list. If something is missing, now is the cheapest moment to fix it.
- A Nautobot instance you can log into, container or full install, it does not matter yet.
- The Device Onboarding, Welcome Wizard and Nornir apps installed.
- A location for your devices to live in, together with the location type it belongs to.
- The manufacturers you actually own, and no others.
- A device type for every model sitting in your lab.
- The roles you actually use, and no more than that.
- A platform per operating system, with the network driver and the NAPALM driver filled in.
- From the shopping list: routing, firewall rules and credentials from your Nautobot server to the devices in scope, and the name of whoever owns them.
Notice what is not on that list. There are no devices in it. That is the whole point of this part: the ship is rigged before anything comes aboard, so that when the data arrives it lands somewhere that already makes sense.
Conclusion
Now that we have set our ship ready to sail, we can start the onboarding process. In the next part of this series, we will cover how to onboard your devices into Nautobot and how to verify that the data is correct.
If you have any questions, feel free to reach out! All my contact details are on the about page.
Resources
Nautobot
- Nautobot documentation
- Installation guide
- demo.nautobot.com, a public read only instance with nothing to install
- Platform model reference, for the network driver and NAPALM driver fields
- netutils, the library that translates one network driver into the Netmiko, NAPALM, Scrapli and Ansible equivalents
The apps from the shopping list
- Device Onboarding installation guide
- Welcome Wizard installation guide, and importing models with it
- Nornir installation guide
- DeviceType library, the repository the Welcome Wizard imports from
Going further
- 100 Days of Nautobot, if you want the full tour instead of the shortest path
- Part 1 of this series, if you landed here first